
A practical guide to planning, laying out, leveling, joining, and securely mounting kitchen base and wall cabinets, including fillers, corner clearances, appliance openings, and final alignment.
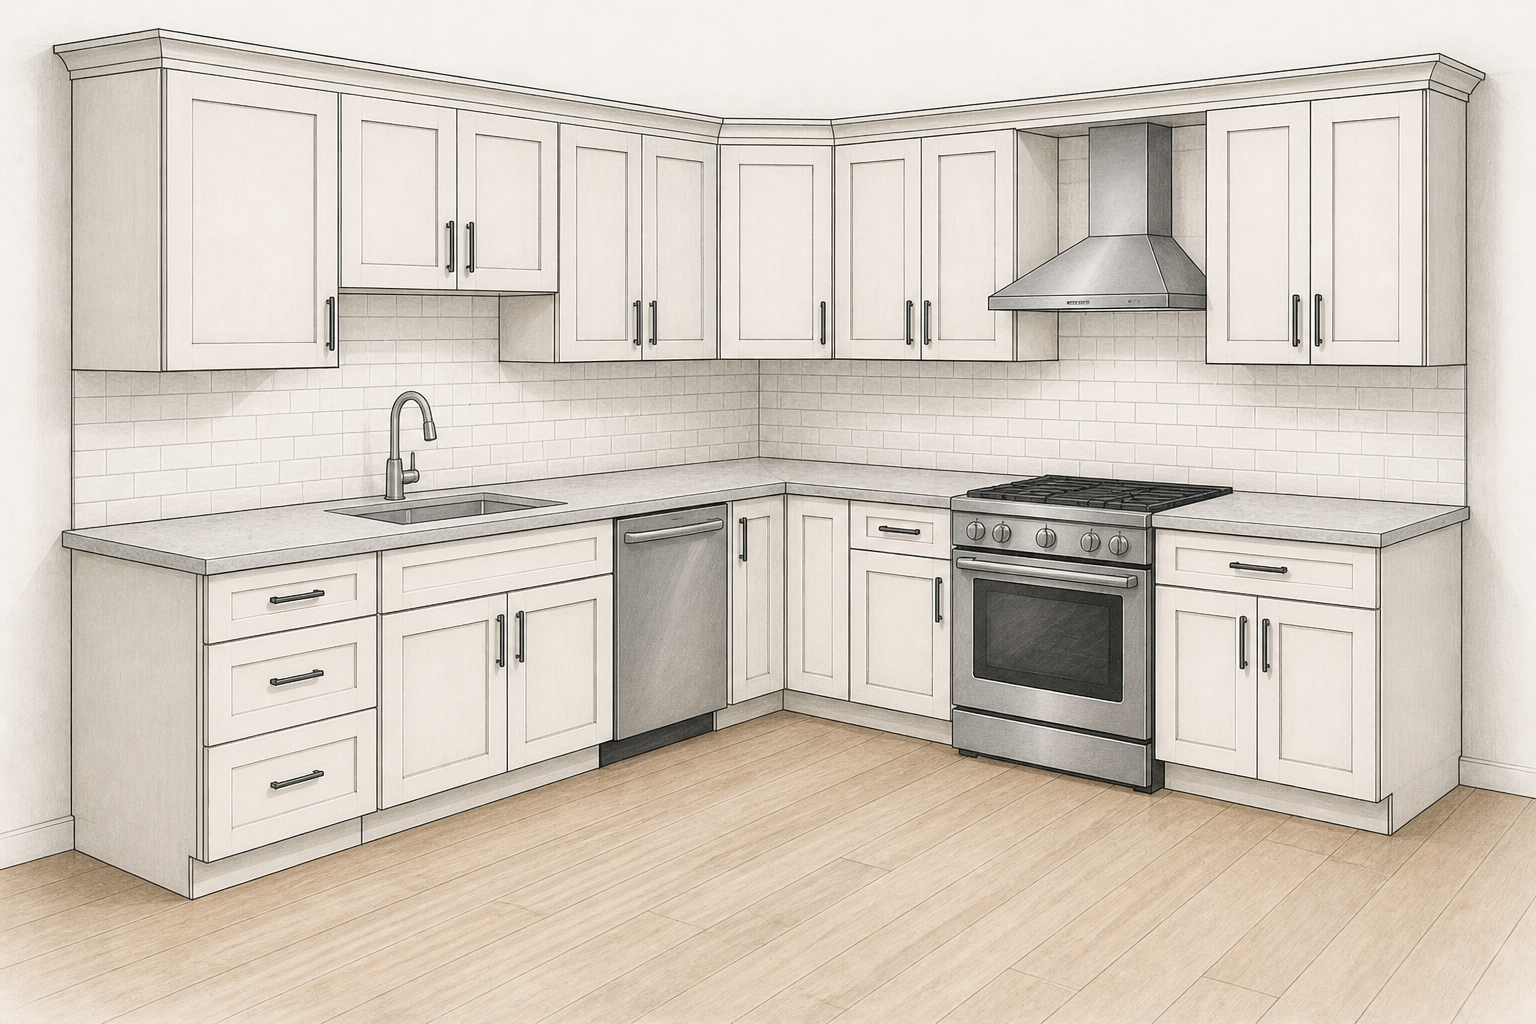
Installing kitchen cabinets successfully depends more on accurate layout and careful leveling than speed. Before fastening any cabinet, confirm the room measurements, appliance openings, finished-floor height, wall conditions, and cabinet sequence.
This guide covers a straightforward kitchen cabinet installation using separate wall and base cabinets. Specialty installations, structural modifications, countertop installation, plumbing, gas, and electrical work may require licensed professionals.
Before You Start
- Total wall-run length
- Individual cabinet widths
- Base cabinet box height
- Wall cabinet mounting height
- Countertop thickness
- Range opening — typically 30 inches
- Dishwasher opening — typically 24 inches
- Refrigerator opening — commonly 36 inches, verify model width and ventilation clearance
- Microwave or hood opening — commonly 30 or 36 inches
- Appliance height and depth
- Manufacturer-required installation clearances
- Finished-floor height
- Ceiling height
- Stud locations
- Electrical, gas, water, drain, and ventilation locations
- Wall plumb
- Floor level
- Corner clearances
- Filler widths
- Door and drawer swing clearance
- Manufacturer-required fasteners
Installation Steps
Step 1 Confirm the cabinet plan
Review the cabinet layout and confirm:
- The width of every cabinet
- The order of the cabinets on each wall
- Required fillers beside walls and appliances
- Corner cabinet or corner filler allowances
- Finished end panels
- Plumbing and electrical locations
- Door, drawer, and appliance clearances
Add the widths for each wall run and compare the total with the available wall space before installation begins.
Confirm the selected appliance model numbers before finalizing the cabinet layout. Typical planning openings are approximately 30 inches for a standard range, 24 inches for a dishwasher, 36 inches for a refrigerator space, and 30 or 36 inches for an over-the-range microwave or hood. Always use the manufacturer’s required rough-opening width, height, depth, ventilation clearance, door swing, and utility-location specifications for the exact appliance.
Step 2 Inspect the room
Check the walls for plumb and the floor for level.
Locate the highest point of the finished floor. Cabinet height measurements should begin from this point so the base cabinets and countertop remain level throughout the room.
Mark wall studs and identify any plumbing, electrical wiring, vents, or other utilities that could affect cabinet fastening.
Step 3 Establish reference lines
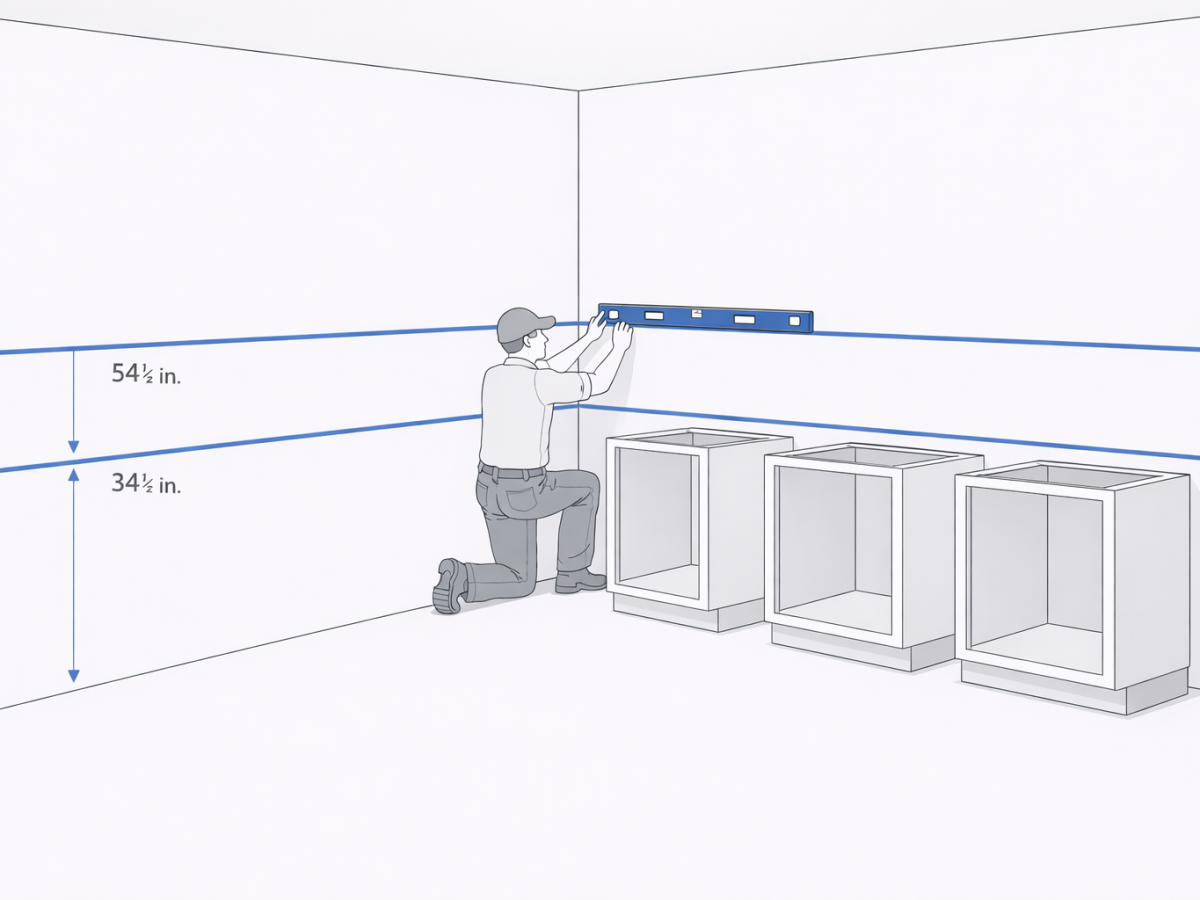
Mark a level reference line for the top of the base cabinets.
A typical base cabinet box is approximately 34 1/2 inches high before the countertop, but always use the actual cabinet specifications.
Mark the bottom and top positions of the wall cabinets according to the approved design, ceiling height, countertop clearance, and appliance requirements.
Use a laser level or a long spirit level to extend these lines across the installation walls.
Step 4 Lay out every cabinet location
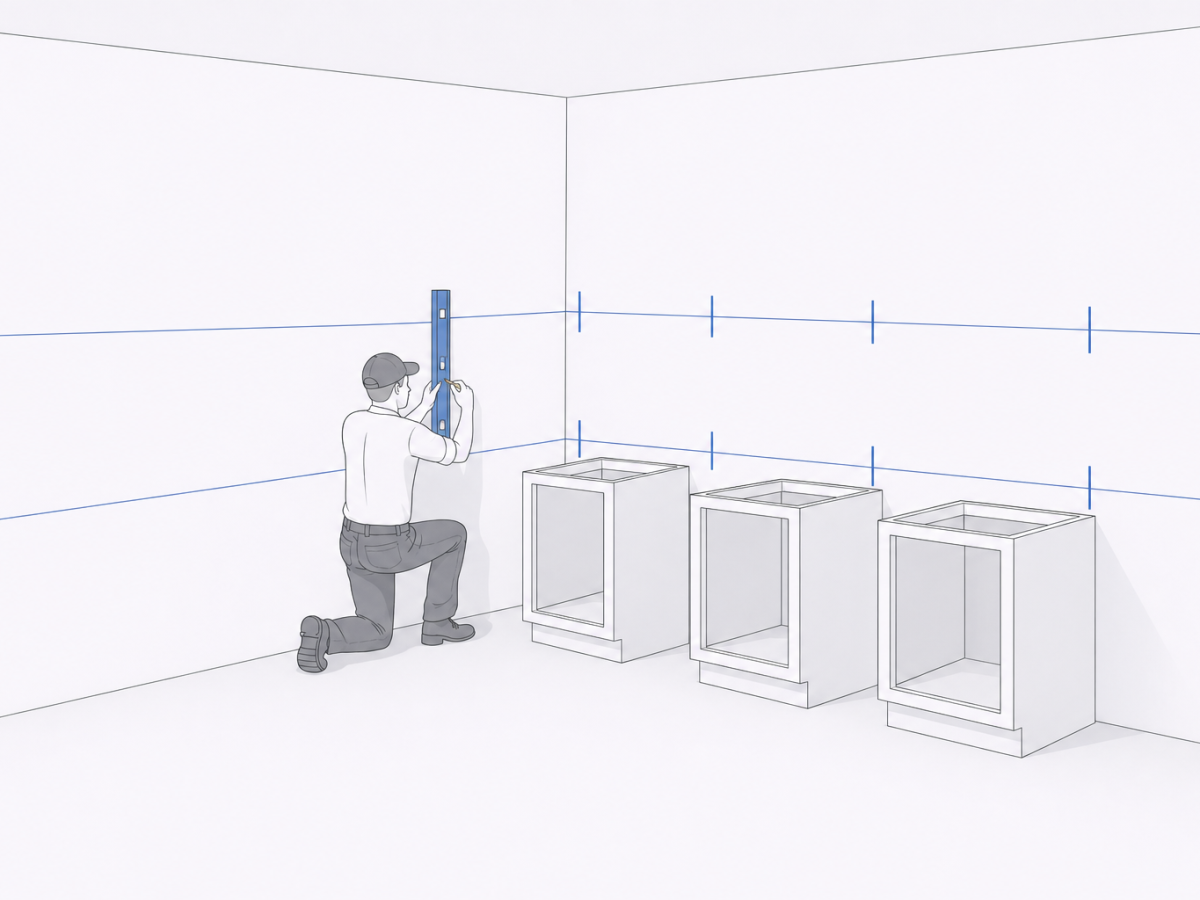
Transfer the cabinet plan to the wall.
Mark:
- Cabinet edges
- Appliance openings
- Fillers
- Finished panels
- Corner clearances
- Stud locations
- Utility openings
Confirm that the layout matches the cabinet widths before drilling or fastening anything.
Step 5 Prepare the cabinets
Remove doors, drawers, and adjustable shelves where practical. This reduces weight and helps prevent damage.
Label removed parts so they can be returned to the correct cabinet.
Inspect each cabinet for shipping damage, correct dimensions, and proper door swing.
Step 6 Install a temporary ledger for wall cabinets
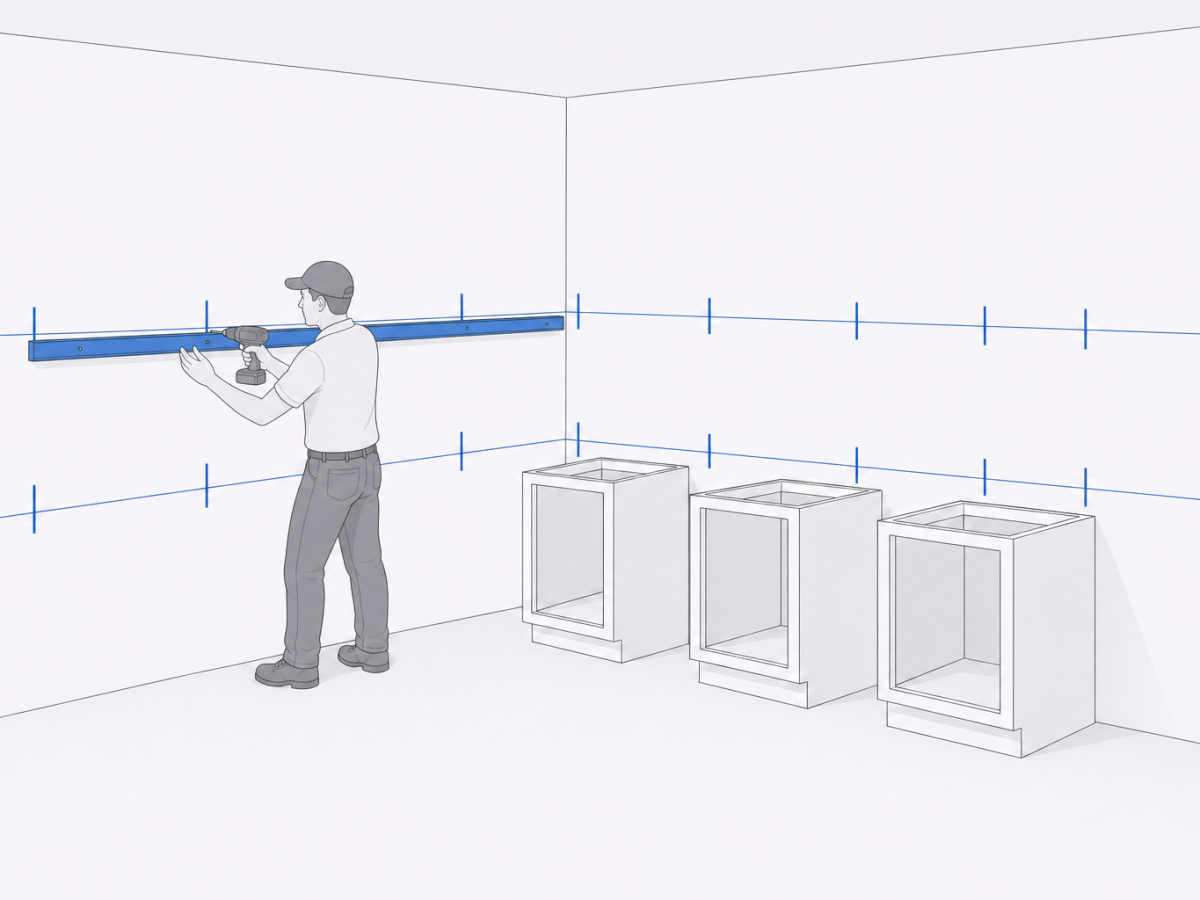
Fasten a straight, level ledger board beneath the planned bottom edge of the wall cabinets.
The ledger supports the cabinets while they are positioned and fastened.
Secure the ledger into wall studs. Do not rely only on drywall anchors.
Do not place the ledger where it could damage plumbing, wiring, tile, or other concealed materials.
Step 7 Install the wall cabinets
Wall cabinets are commonly installed before base cabinets because this provides better access and reduces the risk of damaging the base cabinets.
Begin at a corner, finished end, or another clearly established reference point from the cabinet plan.
Use a cabinet lift or at least two people for heavy wall cabinets.
Position the first cabinet on the ledger, level it, check it for plumb, and temporarily secure it into structural framing.
Do not fully tighten the cabinet against an uneven wall. Use appropriate shims to keep the cabinet box square.
Step 8 Join adjacent wall cabinets
Position the next cabinet beside the first.
Align the face frames or cabinet box fronts. Clamp the cabinets together using protective pads.
Predrill and fasten the adjoining cabinets together in locations recommended by the cabinet manufacturer.
Recheck:
- Face alignment
- Cabinet top alignment
- Level
- Plumb
- Cabinet squareness
Then secure the cabinet to the wall framing.
Continue across the wall run.
Step 9 Install fillers and finished panels
Cut fillers carefully to match uneven walls while maintaining the intended cabinet spacing.
Predrill and attach fillers through the cabinet box or face frame as appropriate for the cabinet construction.
Confirm that fillers provide enough clearance for:
- Doors
- Drawers
- Handles
- Appliance doors
- Adjacent walls
- Corner cabinet operation
Install finished end panels according to the cabinet manufacturer’s instructions.
Step 10 Install the base cabinets
Begin at the room’s highest floor point or the primary corner/reference cabinet shown in the layout.
Position the first cabinet and adjust it using shims.
Check:
- Front-to-back level
- Side-to-side level
- Plumb
- Cabinet squareness
- Reference-line alignment
Fasten the cabinet into structural framing without twisting or distorting the cabinet box.
Step 11 Join adjacent base cabinets
Position the next cabinet beside the installed cabinet.
Clamp the cabinet fronts together, align the face frames or box edges, predrill, and fasten the cabinets together.
Shim beneath and behind the cabinet as needed.
Recheck the full run frequently rather than waiting until every cabinet has been installed.
Step 12 Confirm appliance openings
Measure appliance openings at the front and rear.
Confirm the opening width, height, depth, utility location, ventilation requirements, and required clearances using the appliance manufacturer’s specifications.
Do not assume the nominal appliance width is the required finished opening.
Step 13 Trim the shims and prepare for countertops
After the cabinet run is level, plumb, aligned, joined, and securely fastened, trim protruding shims without disturbing the cabinet positions.
Verify that the cabinet tops form a flat, continuous plane suitable for countertop installation.
Do not use the countertop to correct badly misaligned cabinets.
Step 14 Reinstall and adjust doors and drawers
Reinstall the doors, drawers, shelves, and hardware.
Adjust hinges and drawer slides so the gaps are consistent and doors and drawers operate without interference.
Complete final checks for:
- Cabinet alignment
- Door and drawer clearance
- Appliance clearance
- Filler clearance
- Secure wall attachment
- Visible damage
- Loose fasteners
Common Mistakes
- Measuring from an uneven section of floor
- Failing to locate the highest floor point
- Installing cabinets without first totaling the wall-run widths
- Forgetting fillers beside walls or appliances
- Failing to account for door and drawer clearances
- Installing base cabinets before wall cabinets when access is limited
- Securing wall cabinets only to drywall
- Pulling cabinets tightly against uneven walls
- Joining cabinet boxes before aligning their faces
- Failing to predrill screw locations
- Overtightening fasteners and twisting cabinet boxes
- Assuming nominal appliance dimensions equal required openings
- Using countertops to compensate for cabinets that are not level
- Cutting utility openings before confirming exact cabinet placement